How to Defeat Slaughterspine in Horizon Forbidden West
The Slaughterspine can bring a world of hurt to Aloy's doorstep if its allowed to. Take on this deadly machine and avoid the worst of its devastation by using your attacks wisely.

Horizon Forbidden West builds on the success of its prequel by improving on the best of the latter’s machine designs. While the Thunderjaw remains a formidable machine to face, it was time for Guerilla Games to go big.
A host of new machines are ready to bring Aloy new problems in the Forbidden West with jaw-dropping designs and attacks. From giant serpents to actual war elephants, Aloy faces these new threats with a host of improved techniques and gear at her disposal. Inspiring terror and awe in equal measure, the Slaughterspine carries on the franchise’s tradition of basing their machine designs on dinosaurs. And of course, added a few touches of its own to make things interesting.
This Isn’t Even Its Final Form

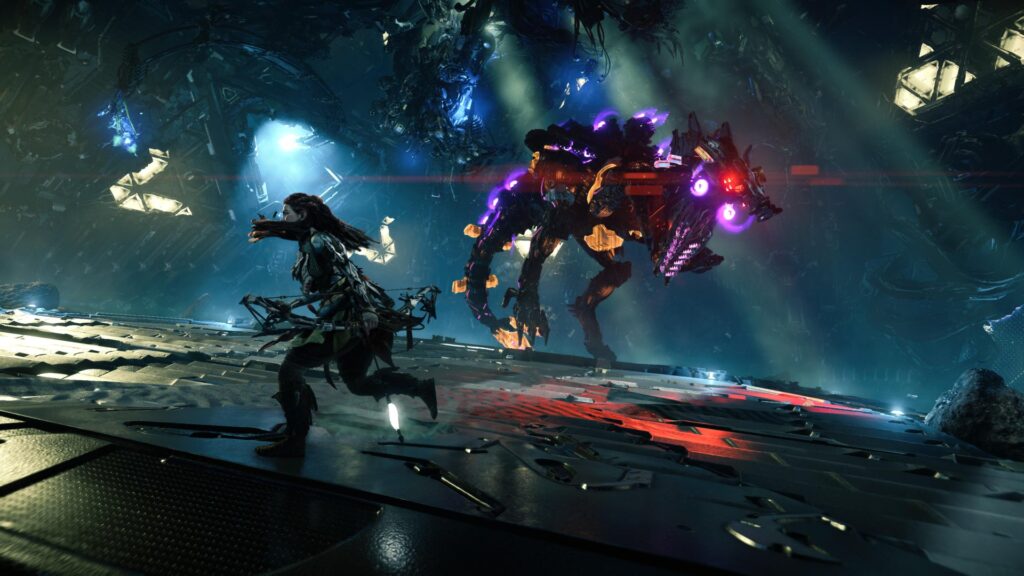
Resembling a Spinosaurus, the Slaughterspine is designed to maximize its damage output while tanking hits with extensive armor plating. Created by rogue subfunction HEPHAESTUS over the course of story events at Cauldron GEMINI, the Slaughterspine appears on rare occasions in the open world.
SUGGESTED: How to Defeat Tremortusk in Horizon Forbidden West
Aside from the one you can encounter at Cauldron GEMINI, Aloy can encounter more of these deadly machines patrolling the coastline on the Isle of Spires, close to where she leaves her boat. Another Slaughterspine guards a PSiClOPS Survey Drone to the northwest of Memorial Grove.
Aloy encounters an Apex variant of the Slaughterspine in the Forbidden Shores DLC, making it a good idea to know how to combat this machine and live to tell the tale. Did we mention it can power up its attacks to devastate the battlefield, Aloy included?
Defeating the Slaughterspine in Horizon Forbidden West
The heart of the Slaughterspine’s arsenal lies in its ability to power up its body with a range of plasma attacks at its disposal for as long as it can hold its charge. It can be a good idea to equip the best plasma-resistant armor you can find for this fight. As for weapons and ammunition, the normal variant is weak to freeze and purgewater damage. Use acid and fire damage for the Apex variant.
While the Slaughterspine is charged up and attacking, there can be little to no opportunities to launch a counterattack. The good news is that once it exhausts these attacks, it relies on melee attacks which can be counterattacked. What’s more, attacking specific components can prevent it from charging up its plasma attacks and even disabling them altogether.
SUGGESTED: How to Defeat Slitherfang in Horizon Forbidden West
When in melee range, the Slaughterspine can either charge at Aloy head-on, launch a whip attack with its tail, or stomp the ground. Each of these attacks can be easily avoided by dodging with the right timing, although they can inflict a lot of damage if any of them land.
You should look to limit the Slaughterspine’s options to these three attacks throughout the fight. Focus on what makes its plasma attacks possible to bring the encounter to more reasonable terms.
For starters, the plasma energizers on its legs are exposed when it is charging up its deadlier plasma-based attacks. Attacking these hold up the charge while also causing a lot of damage per hit. This can be a huge advantage in the early stage of this fight as the Slaughterspine’s armor plating can make it hard to do any damage.
While dodging and weaving through melee attacks or ranged plasma attacks, targeting the plasma earthblaster on the machine’s stomach, and the plasma spine launchers on its back should be your next goal. These disable some of the deadlier plasma attacks that the Slaughterspine can throw at you. You could also target its tail and lower back for the spinetail lancer and chillwater canisters respectively.
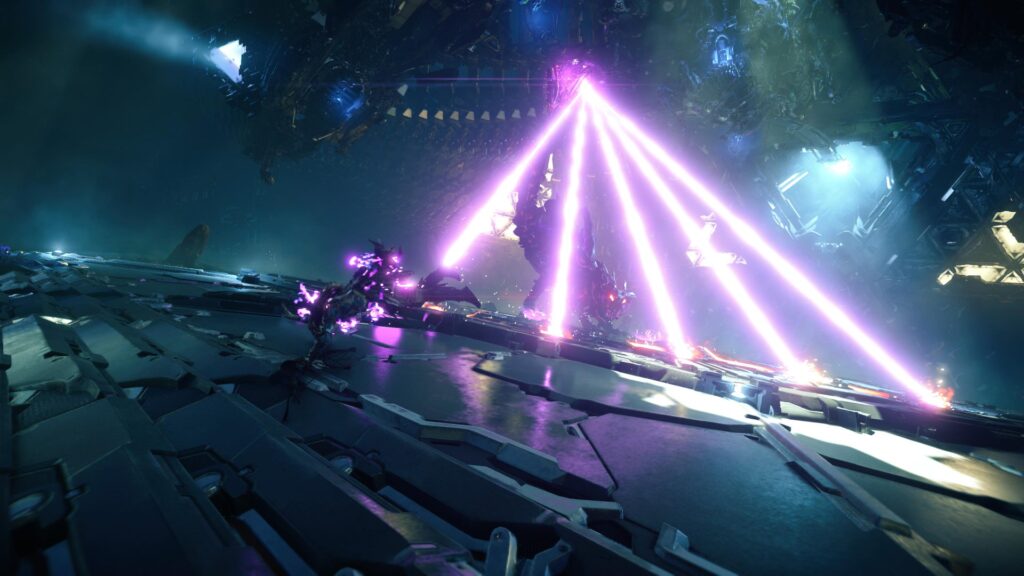
Targeting these four components is important as you then disable a series of very deadly attacks: powerful homing plasma missiles, homing plasma orbs, plumes, and laser beams. All of these rely on a full plasma charge from the energizers, along with another highly dangerous attack.
The Slaughterspine charges up a cannon in its mouth, firing a very powerful plasma beam and quickly arcing in a circle. It is important to learn how to dodge this attack as it is very unlikely you can survive it without a full health bar.
Once its plasma attacks are taken out of the equation, the Slaughterspine can then be dealt with fairly easily. The plasma core in its chest should be your main target, as it deals a lot of damage to the machine when it’s hit.
Remember that the Slaughterspine shares the same level as the game’s final boss, while its Apex variant goes above the max player level. It is best approached with caution and strategy, dealing damage only when there is an opportunity to do so.
This deadly machine should be easier to take down on higher levels of Horizon Forbidden West although it is no less of a threat.