How to Complete Holdout, Act 3 Tier 4 Mission in MW3 Zombies

Modern Warfare 3 Zombies has packed the most interesting missions of the season. Though these missions don’t give them challenging tasks to complete, still these missions sometimes become challenging and confusing. As players progress more toward the finale missions of each act, they will see tasks are getting tough. So, it won’t be a surprise if you look for some help to know how to complete Holdout mission in Act 3, Tier 4.
It is not wise to jump into the mission skipping some important steps. Players must understand the initial steps to prepare for the mission. So, let’s start with the mission objective.
Modern Warfare 3 Act 3 Tier 4 Holdout Mission Objectives
If you have played the Warzone 2 DMZ mode before playing MW3 Zombies, you can find the similarities between these two modes. Though the Urzikstan map blended the elements of DMZ well with the Zombies, the mission pattern reveals the similarities clearly. Like DMZ, in Zombies mode the missions are divided into different objectives, and completing each will finish the mission.
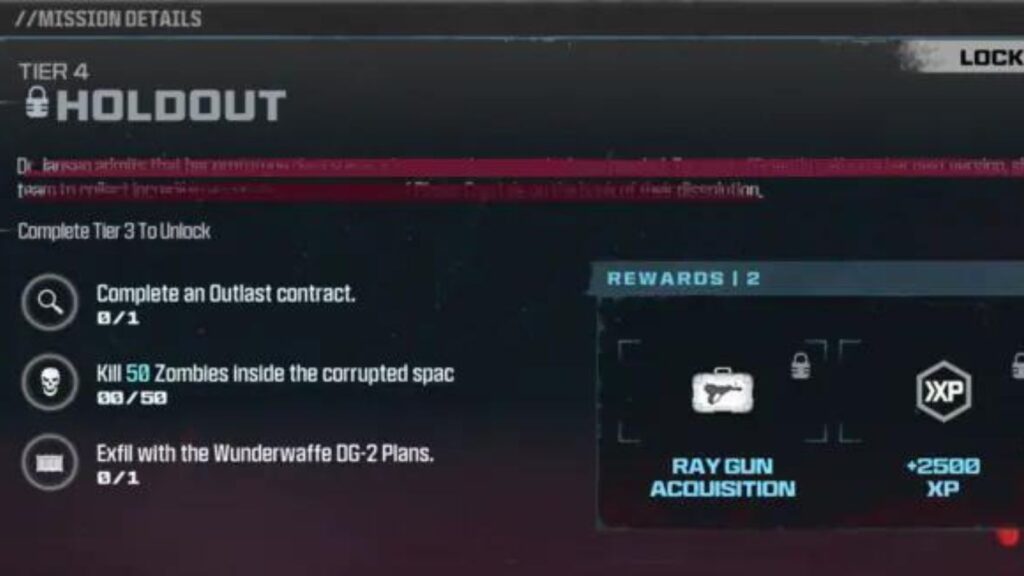
So, if you are trying to complete the Holdout mission, check out the following objectives:
- Complete an Outlast contract
- Kill 50 zombies inside the corrupted space
- Exfil with the Wunderwaffe DG-2 plans.
SUGGESTED: How to Complete Chaperone Act 1, Tier 5 Mission in MW3 Zombies
All these steps need to be completed separately to finish the mission. If you are still unsure of how to start and progress, the below section will help you with the steps.
Best Method to Complete Holdout Mission in MW3 Zombies
As you upgrade to the high-tier missions, tasks are expected to become more challenging. But the Holdout mission is different. The objectives of this mission are relatively simple for a tier 4 mission. This mission doesn’t require high-tier pack-a-punch weapons or equipment. Having an SMG or LMG is enough to complete it.
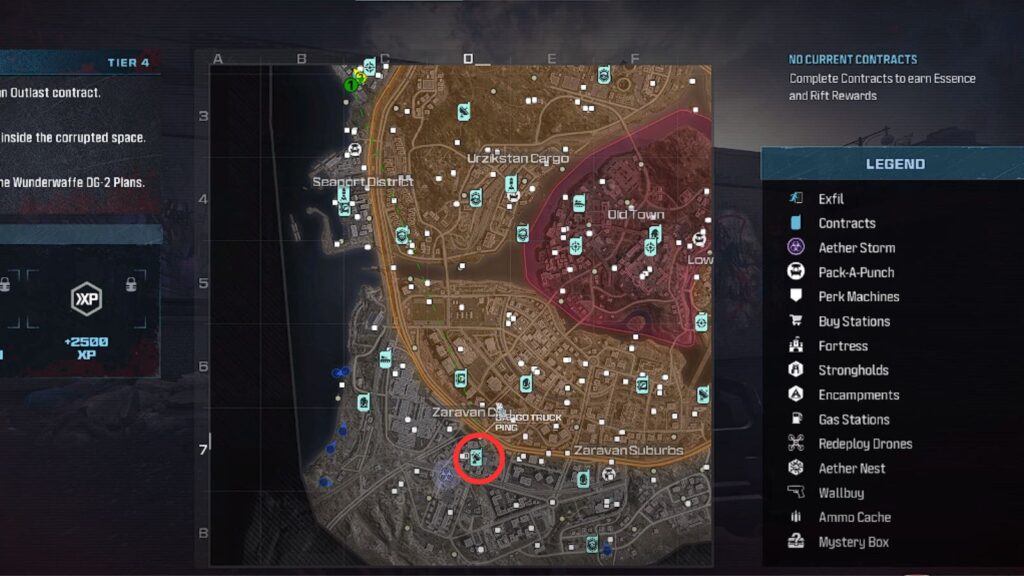
To begin with it, you must first look for an Outlast contract. So, open your map and look for a satellite icon on it. You can find them in random locations, but we suggest accepting one in the low-threat area. If you are not sure of the Outlast contract icon, check the above map for a clear reference.
Once you locate the contract, mark it and travel to the location. Find the phone to accept the contract. As soon as you accept it, a new location will be marked on your map. Generally, these locations are near the contract location.
Go to the location and enter the building. You will find a PND device inside the building that you must activate and that’s the task of the Outlast contract. However, this activating process requires some time. As you interact with the machine, a bar will appear on your screen, showing the progression of the activation process. At this point, players should know that one Outlast contract can be claimed only once per mission. So, the Outlast mission you have marked, if someone else activates it before you do, you must find another one to start your mission.
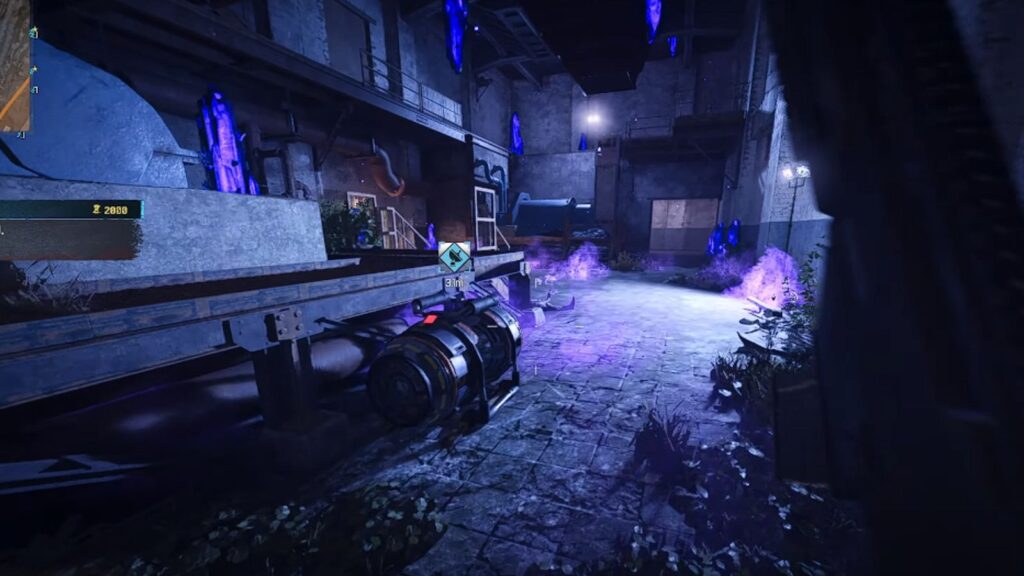
Once the PND activation process is on, you must complete your second task, before the process ends. Eliminate 50 zombies while staying inside the corrupted area. When you enter the building with the PND device, you will see your screen has become purple. That indicates the corruption. So, the task is to stay inside the area and kill the required number of zombies. Remember, killing zombies outside the corrupted area, even during the PND activation process won’t count. Similarly, no matter how many zombies you kill before or after the Outlast Contract, those won’t affect your progress. The zombies must be killed inside the corrupted building, during the contract.
SUGGESTED: How to Complete Infiltrator Act 1, Tier 4 Mission in MW3 Zombies
Generally, after you start activating the PND device, zombies start spawning inside the corrupted area, but if that’s not enough to reach the instructed number, lure the zombies from outside into the building. Getting 50 kills is not a big deal. However, we don’t recommend using Nuke as these kills probably won’t count toward your progress.
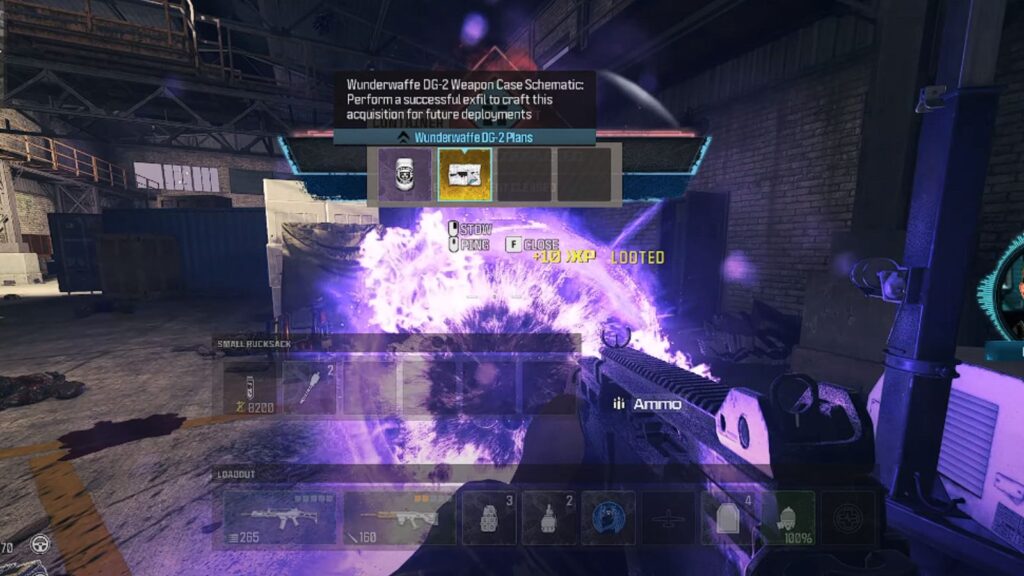
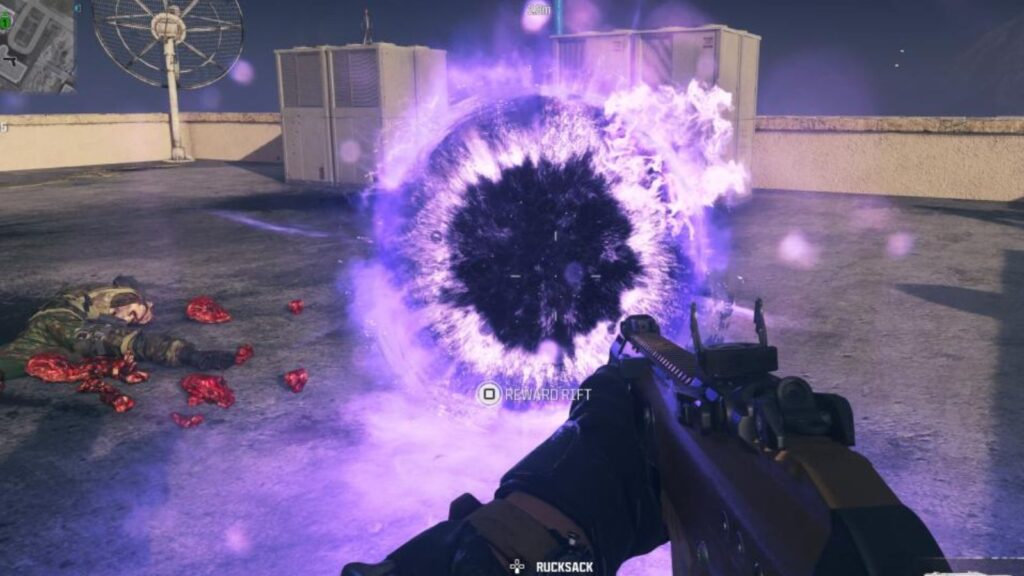
Now, coming to the third objective, players may get confused about how to get the Wunderwaffe DG-2 Plans. As a Wonder Weapon, these schematics can’t be randomly found. Well, that’s true, but if you are trying to find it as part of this mission, you will get it from the reward rift that spawns after the Outlast Contract ends. There’s a catch, though. It seems to be rare but if you are not lucky, you may not get the Wunderwaffe DG-2 plan from the outlast contract. Don’t worry. Start another Outlast contract and repeat the same process to reach the reward rift. This time you may get it. Otherwise, you must repeat the process a few more times unless you get the plan.
After you receive the plan, the next step is to exfil. This process is not complicated, but full of danger. Once you reach the nearest exfil zone, zombies will start attacking you. Fortunately, the zombies in the exfil zone are low-tier zombies who are easy to deal with. Remember, you must board the chopper safely and leave the session. If you die, you have to repeat the entire mission.
Rewards for Completing Holdout Mission in MW3 Zombies
If you successfully complete the mission, Activision won’t let you go without rewards. Like every other mission, the Holdout mission also gives you the below items as rewards:
- Ray Gun Acquisition
- 2500 XP.
Both these items are exciting as rewards. If you are trying to level up nothing can give you more boost than 2500 XP. Also, Ray Gun Acquisition is one of the greatest rewards one can have. So, if don’t want to miss these items, complete the Holdout mission without dying.
That’s all you need to know about completing the Act 3 Tier 4 Holdout mission in MW3 Zombies. Well, players can easily complete this mission in the solo mode, still, we recommend having some teammates to make survival and the exfil process easier. Because if you die while trying to exfil, all your efforts will be wasted. Only having a few pro teammates can prevent this. Anyway, that’s not a must, at least for this mission. If you have confidence in your skills, you can complete it alone.