All Hidden Faces Locations in Hellblade 2
Let's learn the lore of Senua's world in Hellblade 2.

Senua’s Saga: Hellblade 2 follows a linear story for sure, but this game has a little scope for free exploration. The game has a set path to progress, which has several collectibles to gather to complete various activities. However, some of these collectibles or activities are easy to miss. If players don’t pay attention, it’s no surprise that they miss some of these activities. Unfortunately, Hidden Faces are among them.
Hidden Faces are a kind of collectible to get in Hellblade 2. They are not marked on the map, so players can’t determine the exact locations without having a proper knowledge of where to look for them. Even if you pay close attention to the environment, you can still miss a few. Therefore, it is pretty normal that you are trying to get some help in locating these hidden faces.
All Hidden Faces Locations in Hellblade 2
Throughout the game, players will encounter 17 hidden faces, and each of them hides a tree, which gives the backstory regarding the lore of the Nordic world that Senua lives in. These faces are engraved on stones, and often, when you reach near a hidden face, Senua will alert you about some hidden item nearby. Still, without proper knowledge, you may miss them.
SUGGESTED: Fortnite Brings Out Metallica, Magneto, and Fallout’s Power Armor for Chapter 5 Season 3’s Launch
Approaching these hidden faces will unlock the path to reaching the tree and knowing the background story of the world. Let’s check the below list for all the necessary information about the locations.
Freyslaug Hidden Faces
The second chapter of the game has two hidden faces to discover. Surprisingly, the introductory chapter of the game has no hidden faces to discover. Below, we have discussed their locations:
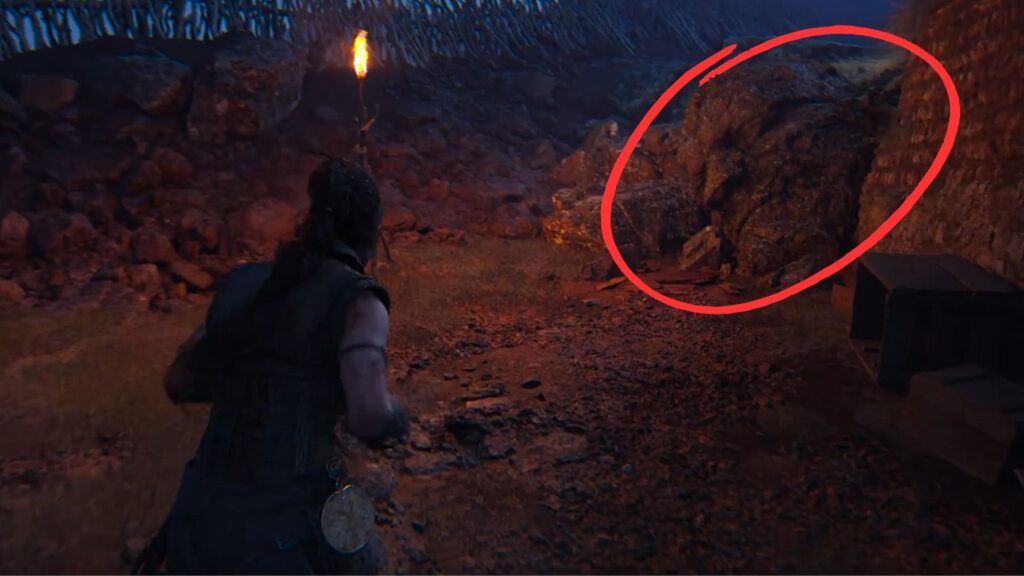
- The first hidden face will be found after you obtain Senua’s mirror and use it in battle for the first time. Once the fight ends, cross the large bridge and go through a big house. Eventually, you will come across a torch, and the hidden face is next to it, attached to another longhouse.
- The second hidden face of chapter 2 will be found after Senua rescues the stranger named Fargrimr and starts walking down the path. As you keep exploring more about Fargrimr, you will come near a broken bridge. Turn left and go down the path to locate the hidden face.
Raudholar Hidden Faces
The third chapter of the game has five hidden faces to explore. Don’t worry about missing even one, as we have prepared a detailed walkthrough:
- Once you begin your journey with Fargrimr and the slaver Thorgestr, you must start progressing toward the destroyed village. On your way, you will find a giant crack in the ground. Follow the wreckage to the left, and you will find the hidden face.
- The second hidden face will be found in the opposite direction from the previous one. Get back to the point from where you started, following the crack to the left. This time, start following it to the right. Eventually, you will reach the largest ruined house. Go past it, and let Senua go through the little hole. Now, go down the hill, and the fourth face will be on your left.
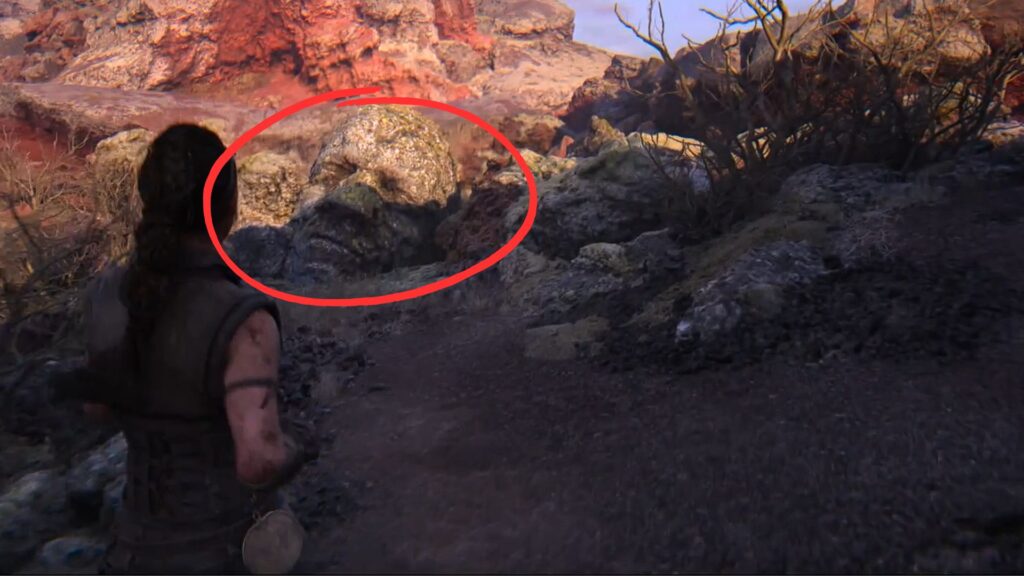
- The third face will be located after Senua starts interacting with Fargrimr about the Hiddenfolk. Start following the linear path, and the hidden face will be found on your left side, where the path is divided into branches. It has a red rock cliff behind it.
- Complete the first Hiddenfolk puzzle, and once you start going forward and following the path, the hidden face will be found on your left. This is a large face, which is hard to miss.
- Once you complete the second Hiddenfolk puzzle, progress through the main path and take a right from the point where the path is divided. From there, climb up two ledges to locate the hidden face.
Huldufolk Hidden Faces
The fourth chapter of the game has four hidden faces to discover. Below, we have mentioned their locations:
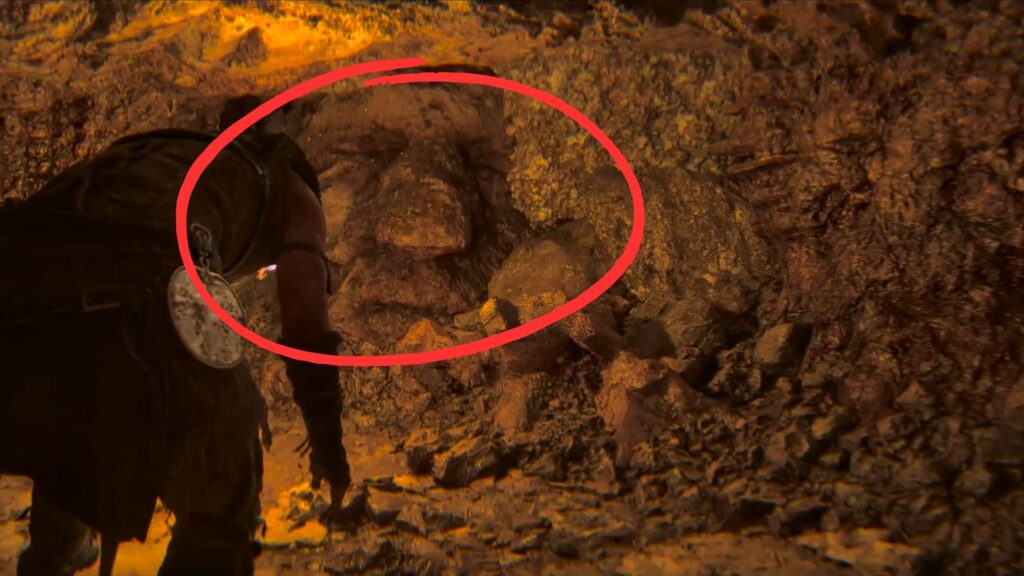
- The first face appears early after you begin the chapter. Once Senua’s journey through a cave begins, make sure to stick to the left-side walls, especially after she starts crouching. The hidden face will be found on the left-side wall.
- To find the second hidden face, first locate the second blue torch. Once you extinguish the torch, turn around, and you will find the hidden face directly behind the brazier.
- The third face is craved at a dead end. After the second face, turn right and locate the hole. Drop down from there, and you will reach the dead end with the face.
- The fourth one will be found after Senua follows the Hiddenfolk light without her sword. Once she is safe, turn left to locate the hidden face.
Bardarvik Hidden Faces
After the four chapters, players have now reached the final chapter of the game with the highest number of hidden faces to explore. Chapter 5 has six hidden faces scattered throughout it, and players will miss some parts of the lore if they miss any of them.
SUGGESTED: After The Last of Us Part 2, Naughty Dog Is Working on Its “Most Thrilling” New Game
Though, after finding so many hidden faces, you must have had a good idea of locating them, a little help always makes things easier. So, below are the locations of all six faces:
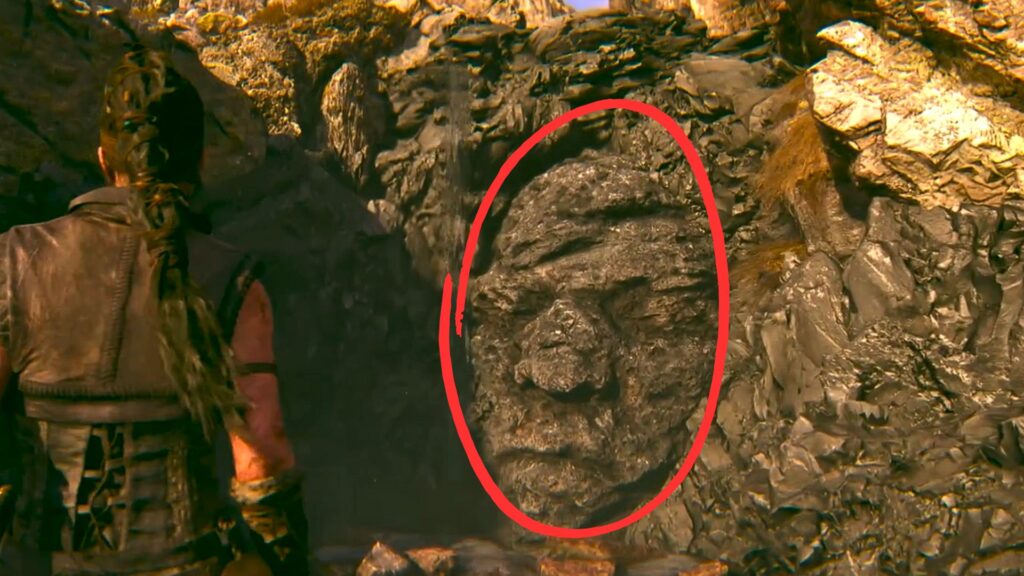
- The first hidden face of the chapter comes earlier, just after players reach the waterfall by following Thorgestr and Fargrimr. The waterfall will be found on the right side, and next to it, the hidden face is crafted.
- The second one will be found just after you have started your journey with Astridr. As you interact with and follow him, you will eventually reach a narrow path. Players need to squeeze through the path to progress. Before doing that, look at the right side, and at a little distance, the hidden face is located.
- Solve the first shape puzzle to find the third hidden face of the chapter. Once the new road opens, start following it, and soon you will find the hidden face on the right side. This is far before you reunite with Astridr.
- The fourth one will be found when players solve the second shape puzzle. On the right side of the beach, players will find a narrow path hidden behind the mist. At the end of the passage, you will find the Lorestangir, and turning around will reveal the hidden face on the left side wall.
- After the underwater sequence ends, Senua will reach a beach that is being ravaged by a storm, along with the nearby village. Follow the path to reach the village until you can turn right. Reach the third house on the right side, and in its backyard, the hidden face is carved.
- The final one will be found in the same village. This time, take a left turn from the main road and reach the dead end, where the house has a torch next to it. The hidden face will be found on the left side of the torch.
These are the hidden faces to locate on Hellblade 2. Now that you have started your Hellblade 2 journey, you must want to be a pro in the game. We hope our guide helps you have a smooth journey. Also, for other inquiries or information, check out our Hellblade 2 pieces to get help.